Showing posts with label PhotoStory. Show all posts

Saturday, April 11, 2009

Edna Mini-Conference

Bridges, Global Education, e-Portfolios and Web Conferencing

Image: Going out on a limb by Penny Ryder

On Wednesday I presented for an Edna Mini-Conference. Edna stands for 'Education Network Australia'. They search for, review and provide a number of online educational resources of particular interest to Australian teachers.

During the day, Pru Mitchell, Cecily Wright and Concetta Gotlieb shared about the services Edna offers and discussed some of the resources and tools that we might want to use in our classrooms. It was a particularly informative conference and I left with a lot of ideas bouncing around my mind.

I was quite nervous about presenting, so luckily was able to do my part early and then enjoy learning for the rest of the day. I presented on Building Bridges between home and school using email, blogging, podcasting and other online learning environments for students.

After that, I attended a session on Global Education resources (see Tech Tips Tuesday next week for more information). I then attended a session on e-portfolios, followed by a session on web conferencing.

I'm not sold on e-portfolios yet - I'd like to see more information about their effectiveness. I would love to be able to use an e-portfolio myself, to strengthen my position in a job interview, however employers don't seem to be looking for this.

One thing I really like about e-portfolios is the focus on students being the ones to select and reflect on the items contained in it. I would like to find a way to make this task truly student self-directed and self-managed. Maybe I could create a class folder of photographs that students could use to create their e-portfolio in the form of a PhotoStory. This doesn't strictly fit the description of an e-portfolio, but may be a valuable reflection tool all the same.

I'm still trying to work up the courage to do some more with web conferencing too. Skype is not currently accessible at school, but there's really nothing stopping me from exploring it further with other teachers at home. Maybe I could 'sit in the chatroom' for an episode of Ed Tech Talk these holidays. I think I'm ready to step outside my comfort zone again!

As you can see, the Edna Mini-Conference was quite inspiring and motivating. I really enjoyed the opportunities to network with other local teachers across educational sectors. It was great to see how Edna is being used in such diverse ways and to meet needs of learners of all ages. It was particularly fun to meet one of my tweeps (Twitter people) who I had only 'chatted' with previously. Thanks Edna for a great day!

If you would like to read about other Professional Development I have attended, click here.

Monday, January 12, 2009

Tech Tips Tuesday

This Week's Tip: Take Note of the Beauty Around You

With all the buzz and hype of Web 2.0 - developing a PLN, connecting online, and finding open education resources - I sometimes find that I haven't managed to leave the house all day. I've been so busy doing 'stuff' online that I couldn't tell you whether there was a gentle breeze blowing, or whether the roses are blooming, or the colours in the sunset. Tonight I took my dog for a walk. I looked at the ants crawling up the bark on the trees. I noticed the sun setting over the mountain ranges. And it really is beautiful. So my tech tip this week is to take note of the beauty around you. Capture it, if you can, and share it.

Someone who does this particularly well is Tony Farley. Tony has created some marvellous videos of Beautiful Places in High Definition. The images are breathtaking and the narrative well thought out. Tony gives a description of the place and its history. He then gives you a moment of silence to experience the place for yourself. Tony finishes up with a poem carefully matched to the place he is visiting. Watching these videos is the next best thing to visiting the places in person. The quality of the filming is a visual delight. To view these for yourself, you can watch them streamed from the website or subscribe and download them through iTunes.

I plan to introduce these films to my students early in the school year. I will then get them thinking and talking about local nature areas within walking distance of the school. We will travel to these places, record the area through video, still photos and audio recordings. Students may choose to respond further through researching the area, and recording their thoughts or reflections in poetry. The images and narrative can then be combined through Photostory 3 or Movie Maker. To take it even further, I will help my students to develop a wikispace to share their reflections with others. We can open it up to other people in our school community who also enjoy this local natural environment.

Another suggestion (for those who cannot work with local natural environments) is to encourage students to connect Creative Commons pictures to poetry written by others or to create poems of their own to go with the images. I have done this with Kindergarten in the past - writing haiku poems about images from cut-up nature calendars. I've also done it with Year 3 by running a slideshow of images for students to select from and write a poem about.

I guess my main message this week is not to ignore the beautiful world we live in but rather to cherish and absorb it.

Tuesday, January 6, 2009

Tech Tips Tuesday

This week's tip: Make good use of your digital camera

I have an excellent camera that I keep with me to use throughout the school day and at home. It's a Kodak Easy Share DX7590 that I bought a few years ago, so I'm not sure what the 
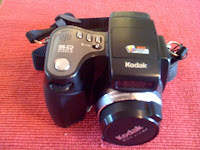
equivalent is today. It has an automatic setting, but also allows for a range of manual options. It can also record short videos as .MOV files.

When I first began using my camera I tended to use it mostly for special occasions. I took the photos, but often that was where they stayed - as a file on a computer. This week, I'd like to share some suggestions for how you can get photos working for you in the classroom. This post is by no means definitive so please share your ideas in the comments.
Build a sense of community with photos of students

Early in the year I take photographs of my students and get them up around the room often as labels. When students see photos of themselves in their classroom they feel a sense of belonging. These photos come in handy for other purposes throughout the year. With young students I have created "Who am I?" classbooks where students write a few clues about themselves at the top of the page and glue their photo with a flap covering it at the bottom of the page. These pages are then compiled into a book. The same photo can also be used for the covers of "Star of the Week" books, a goal wall and portfolio cover pages.


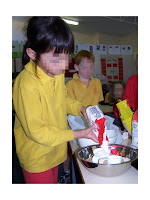
Take photographs of students as they work and learn

Sometimes you notice new things about your students as you take photographs of them as they work. Looking through a frame helps you to zone in on that particular child and block out other distractions. These photographs can help you to reflect on how students are progressing with their development. They also provide visible evidence that can be shared with parents during discussions.

I particularly like to use the video function of my camera to capture students when they work cooperatively in groups. It is interesting to review these later to see how each person participates in the task. I'm often impressed by the sort of language I hear my students using as they work together to solve problems.

These photos and videos can be shared with the school community through a newsletter or added to the class blog or school website.

Take photographs of students as they play and share fun times with friends

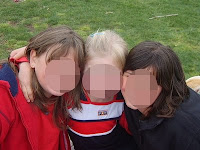
I take lots of photos of the fun experiences we have throughout the year. These events often create positive emotions for students and the photos help students to relive these experiences. Collections of these photographs can be made into a Photo Story or Movie or viewed as a slideshow throughout the year. I received a digital photo frame for Christmas which I plan to use to play photos of the students throughout the day. (As a side note: Today I learnt how to pixelate faces with Gimp!)

Take photographs of student work to discuss as part of a lesson

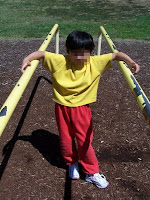
Photographing is a great way of capturing the hands-on experiences of students during a Maths lesson. I took my class out to the playground to explore the concept of position - under, over, between, through etc. The students posed for photos in a position on the playground. I then printed them out straight away and we made labels to go with the images eg. "Hannah is between the bars".

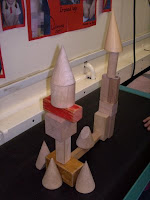
Another time students worked in groups to make buildings out of 3D shape blocks. I took photos of the buildings and then put the images up on the interactive whiteboard for discussion. Students named the different 3D shapes that had been used. This allowed for everyone to have a good view of the buildings without the issues of students crowding the building or blocking someone's view.

As a spelling lesson, students worked in groups of three to make words with a common rime. As soon as a group had made a word they brought it to me and had their photo taken. They then went off to make another word. We then used the digital images to review the words and select spelling words for the week. (Faces are cropped her for privacy but were present in class activities).


Take photographs during excursions, special school events and cooking sessions

Photographs help to aid memory when students sit down to write. If you want students to write a recount of a special event photographs are a great visual aid to assist with ordering the events and including details. When writing a procedure they provide additional visual information which may be difficult to explain in words. These recounts could be made into a PowerPoint slideshow, Photostory or movie and shared with the school community online.


Capture moments of interest to share in class

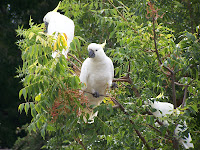
If you have a camera with you when you're out and about (even as an application on your phone) you can be on the lookout for images that will interest your students. I have captured rainbows, dragonflies, cockatoos and hot air balloons to discuss with students in class. This is a great way of bringing science into the classroom without a lot of fuss. It also provides the opportunity to show how science relates to real world experiences.


Take photos for students to use in their artwork

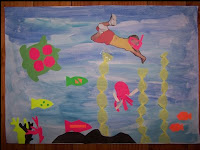
Students can create multi-media artworks including photographs of themselves as the subject. I have seen classes where a photograph was taken and cut along the line of symmetry. Students then drew in the other side of their face.

Recently my students were creating an underwater scene of The Great Barrier Reef. One student asked if we could include a photograph of them pretending to swim as part of the collage. Students lay on the floor and posed for photos which were easily printed and included in the artwork.


Take photos of students with their parents at the school

When we have a learning journey at our school I keep out the camera to take photos of students with their parents as they demonstrate their learning. You can capture some really lovely moments during this time. These photos also remind students about their parents' interest in their learning.
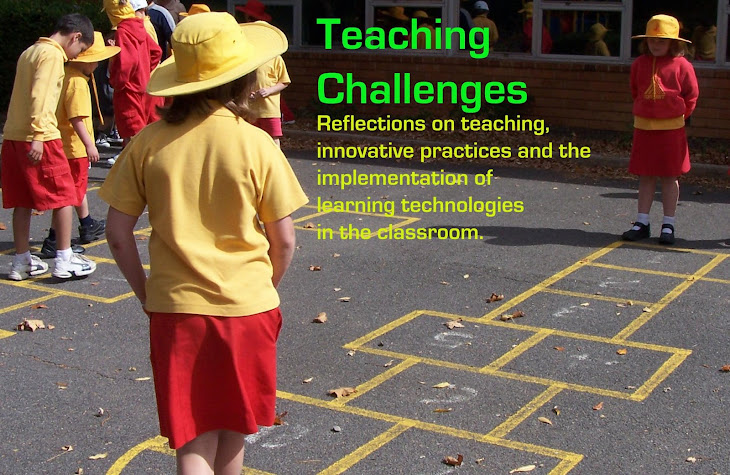
Tuesday, December 16, 2008

Tech Tips Tuesday

This week's tip: Making a Class Movie/Photostory

As an end of year gift for our students, the year 1 teachers decided to make a movie/photostory using photos taken of students throughout the year.
I used Photostory 3 and Bec used Windows Movie Maker. We thought it would be fun to get together and do a comparison of the two programs.

Windows Movie Maker
Bec chose to use Movie Maker as it was already installed on her home computer and she had done a PD on it previously.

Advantages
  • You can click and drag pictures into the story board
  • It's easy to add music to the movie
  • Title frames can be inserted without photo backgrounds
  • Transition selection and video effects are user friendly (click and drag)
  • Can include video segments
  • Easy to include credits
Disadvantages
  • Photos are not stored in the file, so you need to use the same computer in order to access the pictures while editing
  • Periodically crashes and can be slow to load
  • Need to save frequently
  • To finalise and burn the movie to CD within the program takes a considerable amount of time (40mins on Bec's computer)

Photostory 3
I chose Photostory 3 because it is the main one the teachers at my school were using, and because I got frustrated using Windows Movie Maker when I couldn't edit the file on another computer.

Advantages
  • Able to crop and edit photos within the program
  • Guides the user in a sequential process to create the photostory
  • Designed to use photos rather than video

Disadvantages

  • It is difficult to rearrange the order of the photos, so it's best to import them in the order you intend to display them
  • Can't use video segments - photos only
  • Can't insert text slides (text has to be on the image)
  • To make the images fit with the audio, you need to resize the length of time for each image and save changes each time - quite a lengthy process
  • Inserting Slide Transitions is time consuming if you want to personalise them

I also chatted with our ICT specialist and she says that when working with students, she finds Photostory better for younger children with less ICT experience. She has had success with Windows Movie Maker with Year 6 students creating their Graduation movie.

These are our thoughts. Let us know what you've found from your experiences using Windows Movie Maker, Photostory 3, or some other program.

Friday, August 29, 2008

Learning Journey


Next week we will be having a Learning Journey at our school. Learning Journeys are a bit like an open house, where parents come in to see what their children have been learning. The difference is that the children plan what they will show their parents, and reflect on their learning prior to the visit. For teachers, the most difficult part of the Learning Journey is the preparation - on the actual day, it's all up to the students to run the show.

So, what do we teachers do to prepare?

Portfolios
If the school also has portfolios for collating student work, the portfolio is generally 'on display' for the Learning Journey. This allows students to access this information to show their parents as well.

Displays
All the relevant work that students have done needs to be displayed attractively in the classroom, and usually labelled with a poster outlining the task of the activity.

Activities
Parents don't want to spend an hour wading through their child's bookwork. They want to explore learning with their child. This means making sure that there are some hands on activities for parents and children to get involved with. These might be Maths or Literacy games you use in class or Science experiments.

PhotoStory
As many of our classes now have Smart Boards, we want to make use of these during our Learning Journey. Teachers may need to update their "MyClasses" page or prepare a slideshow of digital photographs taken during the year. This helps parents to see their children in "action" on an ordinary school day.

Marking Books
If students finish showing their parents all their work early, they may want to show them some of their bookwork. For teachers, this means checking that the marking is up to date. Some activities are easier to mark as you go along than others. Marking books can often be a tedious and frustrating job to catch up on. A nice idea is for students to annotate their best work in their books with a star post-it note. This is a great tool for helping students to reflect on their learning.

Invitations
Prior to the Learning Journey, it is important for students to make invitations for their parents and take these home. It helps to have an RSVP slip somewhere on the invitation so that you can monitor who will be coming. Some follow up is usually necessary as the day approaches to ensure that all students will have someone to share their learning journey with.

Learning Journey Map
My students usually create a plan of what they will show their parents when they arrive. This is a list of between 5 and 8 things that will help them get started. Once they have explained these items, they can go over other items they would like to show. I usually choose a few items from each of the Key Learning Areas and allow my students to choose one one of these items from each KLA. This way, students have some choice in what they would like to show.

Practice Run
I usually find some time for my class to run through what they will do in their Learning Journey. If you have an older buddy class, this works really well with them. It helps students to think about what they would like to share, and gets rid of any pre-day jitters.

As much work as they are to prepare, it feels great to see it all happening on the day. I get my camera out and snap shots of my kids as they talk their parents through their learning. It's great to catch them explaining what they've learnt, and to realise that it has actually sunk in! For the rest of the day, the kids feel great. They are proud of themselves for all they've learnt, and they have enjoyed showing it all off to their parents.